Going Global: Additional Tips [Systems thinking & modelling series]
This is part 76 (and the final part) of a series of articles featuring the book Beyond Connecting the Dots, Modeling for Meaningful Results.
Web development is a very complex topic with a lot of nuances. The preceding articles should have given you a brief introduction in creating interactive models for engaging an audience and encouraging discussion and learning. Although we cannot give you a comprehensive course in web development, a few additional web development tips will be very useful when you start to develop your own webpages.
Frameworks and Toolkits
Making an attractive web application is difficult. Admittedly, the control panel application we developed does not look very good. We could spend some time improving its appearance by adding additional CSS rules, but since we are not professional designers it is quite possible that the results of our efforts would only look amateurish and unattractive. Additionally, writing JavaScript to interact with webpages is also difficult. These web technologies were developed over decades and many of the functions and techniques are slightly archaic and hard to learn.
Fortunately, a number of toolkits and frameworks have been developed that make it easier to develop powerful and attractive web pages and control panels. Below we highlight some important toolkits that you might want to explore and consider adopting for your own usage. These toolkits can be embedded within your webpage, extending its functionality. They will help you make more attractive and powerful applications quicker. The ones listed are all also available under open source licenses, allowing you to use them for free.
Twitter Bootstrap: Bootstrap is a framework for developing attractive webpages. It has many tools and rules that can be combined to create visually pleasing webpages with minimal effort. If you don’t have a good sense of design, Twitter Bootstrap could be a great help to you.
JQuery: JQuery is a library designed to improve the JavaScript functions needed to interact with a webpage. It generally greatly simplifies and reduces the number of keystrokes you need to carry out some task. For instance “document.getElementById(‘item’)” becomes in jQuery simply “$(‘#item’)”.
JQuery UI: A spin-off from the JQuery project, this toolkit provides control panel elements that are themable and more extensive than the built-in <input> tags. Grids, sliders, and more are all available from this project.
ExtJS: ExtJS is a comprehensive library for developing powerful applications. It has extensive tools to develop interface and control panels. It is also what is used to develop Insight Maker’s interface.
| Exercise 11-11 |
|---|
| Install the Twitter Bootstrap toolkit and use it to redesign the control panel web page to make it more attractive. |
Debugging Webpages
It it almost certain that you will make many mistakes and typos as you develop your webpage. If you make a mistake within the HTML or CSS of the page you will receive an immediate visual indication that something is wrong and you can experiment with your code until it is fixed.
On the other hand, JavaScript errors generally won’t provide any visual feedback that an error has occurred. The most likely indication that a JavaScript error has occurred is that nothing happens when you click a button or expect an action to occur. Debugging issues like this can be quite difficult. Fortunately, with just a little bit of additional work you can access very rich and informative JavaScript error messages, letting you know exactly what went wrong and when.
There are two approaches to accessing the JavaScript error messages. The first is to actually edit your webpage and add code to show an error message when an error occurs. Adding the following to a <script> tag in the head section of your document will do that:
alert(“JavaScript Error: \n\n” + message + ” (line: “ + line + “, url: “ + url + “)”;
}
Now when an error occurs, an alert will pop up with a brief description of the error and information about where in your code it occurred.
The second approach is to use the developer tools that are built into your web browser to study the webpage and observe errors as they occur. Excellent developer tools are built into all modern browsers. These tools let you study the structure of the webpage, profile the performance of your code, and examine how the webpage behaves.
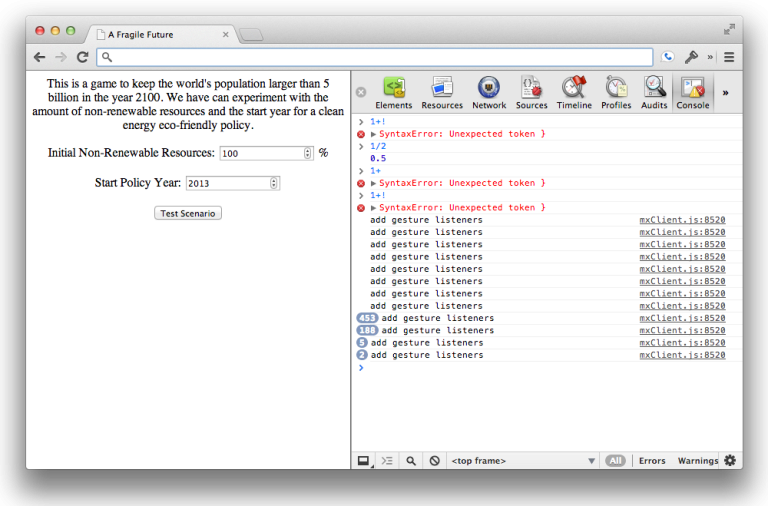
One particular tool is very useful: the JavaScript console. Once you have opened the JavaScript console (search on-line for the exact directions on how to do this for your specific web browser) errors and messages from the webpage will appear in the console as they occur. What’s more, the console allows you to evaluate JavaScript commands in the webpage simply by typing the commands into the console.

One approach to debugging code is to put alert functions into the code. These will update you on the progression of the code or display values of the JavaScript variables. This works, but can be very clumsy and disruptive. When you have the console open, a better approach is available. You can send messages directly to the console providing information on the status of the program. For example:
console.error(“An error has occurred!”);
| Exercise 11-12 |
|---|
| Open up a complex web page such as The New York Times. Then use you web browser developer tools to explore how the webpage is structured and designed. |
Sending Complex Data Back and Forth
The postMessage communication technique to send data back and forth to the embedded model is only reliable for sending strings and objects that can easily be converted to strings (like numbers).1 Oftentimes you will want to pass more complex data from the simulation to the containing window. For instance, you might want to pass the entire time series of values taken on by one or more primitives over the course of the simulation.
To handle these more complex objects you must convert them to strings. JavaScript provides a number of techniques to do so. For instance, you can convert an array back and forth from a string using the join and split functions:
var str = data.join(“; “); // “1; 4; 9; 16; 25”
str.split(“, “); // [1, 4, 9, 16, 25]
By far the most useful and flexible method of converting JavaScript objects to and from strings are the JSON commands. JSON, JavaScript Object Notation, is a general file format for storing data. It is based on the standard method for declaring JavaScript objects (e.g. {key: value}) but has some differences. What is great about JSON is that your browser already has built-in commands for converting JavaScript objects (a number, array, or other object) into a string and then later converting that string back into an object.
You can use this technique to send arbitrarily complex objects back and forth from your simulation to your webpage. Let’s see how the JSON commands works:
var str = JSON.stringify(obj); // ‘{“title”:”I’m a complex object”,”data”:[1,4,9]}’
JSON.parse(str); // {title: “I’m a complex object”, data: [1, 4, 9]};
Hosting a webpage
In this section, we saved the webpages we have created to our personal computers’ hard drives and opened them in a browser from there. This works great for development, but it does not allow us to share our creations with others.
Once you are ready to publish your webpages, you must move the HTML, CSS, and JavaScript files off your computer and onto a web-server or web-host so that others can access them over the Internet. There are a number of options for web-hosting that range from the simple to the complex and from the free to the expensive.
On the simple and free end of the spectrum there are free blogging sites like Blogger or WordPress. These sites allow you to create free blogs but they also allow you to do much more than that. These types of sites will generally let you edit the source HTML of your pages allowing you to implement the demos in this section directly within a blog post.
A step up from simple sites like these blogging platforms are shared hosting providers. Shared hosting providers such as DreamHost allow multiple people to purchase space on a server to run their webpages. There are numerous shared hosting providers available. A more advanced version of shared hosting is Virtual Private Server (VPS) hosting. VPS providers such as RimuHosting are similar to shared hosting providers in that they fit many customers on a single server. Where they differ is that a VPS host will give each customer a virtualized computer. Each individual customer will feel like they have complete control over their own computer and operating system even though they are sharing the actual hardware with others.
At the high end of the spectrum of complexity, cost, and power are dedicated servers. In this case you purchase or rent a machine dedicated solely to hosting your projects. This gives you complete control of your hosting situation but is expensive and may take a lot of effort to set up and maintain.
In general, we recommend starting small. Sign up for a Blogger account and experiment with these techniques there. If you keep at it and your site grows, at some point you will outgrow this simple solution and at that time you can upgrade to a more advanced hosting solution.
Next edition: This article is the final part in the series of articles.
Article sources: Beyond Connecting the Dots, Insight Maker. Reproduced by permission.
Notes:
- The specification for this feature provides that any type of JavaScript object should be supported, however a number of recent browsers only support strings. ↩


